
Oh yes. If you're lucky, those weeks of frantic revision and sweaty exams halls are nothing but a distant memory (or maybe the distant future).
If you're unlucky, they may be right upon you, as they are me.
My friend and I decided something must be done. So we gathered together the most indulgent ingredients we could think of - cream, coffee, chocolate - and set out to make the ultimate comfort food.

Neither of us had made choux pastry before. In fact, I think I've only eaten it a couple of times in my life. But I've been wanting to learn about it for months, and it seemed like perfect timing. Even with minimal experience of eating it, I couldn't possibly deny that it's the perfect food to prepare for the stresses of exams.
I was a bit nervous beforehand, because I knew there was hob-cooking involved, which is rather out of my baking comfort zone. But I'd barely describe what we had to do as 'cooking' at all. And it was so much quicker and simpler than I expected it to be, too. The moral of the story? Go make choux pastry, now! Exams or not!

The magical thing about choux pastry is the way it puffs up. There is no leavening in it at all - no baking powder, no yeast, nothing. The simple fact that it has a high proportion of liquid to the other ingredients means that the steam makes huge bubbles all the way through the pastry. When we piped out our little piles of batter, we worried that they would be too small - and they ended up bumping into each other and being huge! I'd say they easily doubled, tripled, quadrupled in size. It really is magic. And all just from water.
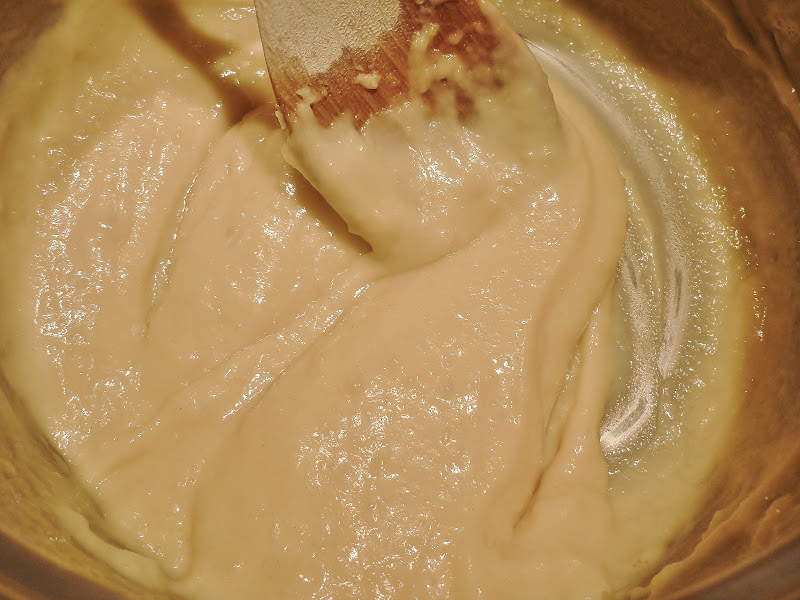
It's partly due to the high water content that the method is a bit different to any other kind of pastry. You start off by heating up the water (and fat) until it's boiling, and then you add the flour and keep cooking it for a minute or two. It's that crucial time that lets the flour absorb the water, and turns the runny mixture into a dough-y batter that's thick enough to work with. If you just mixed all the ingredients together cold, it would dribble off the edge of the baking tray before you got it into the oven.

So once the flour is cooked a bit, and the dough has thickened up nicely, you then add the eggs. The eggs add richness and structure (as well as a bit more fluid) to the pastry, helping it rise even more. Once it's fully mixed, you just make shapes by piping or spooning onto a tray, and then bake them and watch the magic happen.
The ratio is actually really simple:
2 Water : 1 Fat : 1 Flour : 2 Egg
- First put the water and fat (I used butter) into a saucepan. Heat it up until the fat is fully melted and the mixture is at boiling point.
- Turn the heat down (but not off), add the flour quickly and get stirring. The dough will thicken up quickly as the flour absorbs the water. Let it cook for a minute or two and then take it off the heat.
- And that is genuinely all there is to the 'cooking' process. It's nothing at all.
- Let the mixture cool down a bit (or run cold water over the outside of the pan to cool it more quickly), until it's at the upper end of warm. Not so hot that the eggs will scramble when you add them, and not as cool as lukewarm.

- Add the eggs, one at a time to make them easier to mix in. It takes a minute or two until they fully incorporate but as long as you keep mixing it will come together.
- And it's ready to cook. Dead easy. You can also keep it in the fridge for a day before cooking if you want to prepare it in advance.
- We used a piping bag to shape ours. It was my first time using a piping bag, though - I'm sure you can tell by how messy and scraggy they were! For éclairs, pipe lines which are about the length you want the éclair to be (but nowhere near as thick). For puffs or profiteroles, just make little piles. We thought ours were going to be too small and they turned out huge, so if it's your first time making and you're aiming for dainty profiteroles, then err on the small side to be safe!

- We used the temperatures advised in Michael Ruhlman's book Ratio - 220C for ten minutes, then 180C for another ten or twenty until done. But looking at some of the recipes out there, it seems everyone has a different way of doing it. Some recipes decrease the temperature part way through, some increase it, some keep it the same all the way. And the actual temperatures used vary between unexpectedly low to worryingly high. If I made them again, I would probably just cook them at my safe temperature of 180C. We poked a skewer into one to see if it looked cooked, but you can sort of tell by how they look on the outside anyway - fully puffed up, golden and crispy.
- A batch with 200g of water (100g fat, 100g flour, 4 eggs) will make about 24 profiteroles.

- Our fillings were pretty makeshift really. For the cream filling, we whipped a carton of cream and then added the coffee and cocoa (and a little bit of sugar) by dissolving them in some milk and then adding that. We just sort of, guessed the amounts and kept tasting until we were satisfied. The topping was just icing sugar and water, with some coffee and cocoa added by dissolving first in hot water and then mixing in. Again, we just tasted until we were happy.
- Oh, and the reason a couple of those round buns look a bit strange is because their bottoms were ripped off when we took them off of the baking tray! So we filled and served them upside down. Always grease your baking tray.

Comfort food at its finest. I think everyone's predicted grades just improved.

No comments:
Post a Comment