
The first thing I found when I started looking up recipes for Danish pastry was a load of articles saying "It's not as scary as you think!". Considering I actually didn't have an opinion on how scary it was before I started, that all actually made me feel worse about the whole thing.

I'm not going to tell you it's not as scary as you think. Instead I'll just tell you it's not scary. It's seriously not. It's not even difficult. It's just slightly longwinded and takes a bit of time planning. Apart from that, it's no more advanced than anything else I've made here so far.

So what is Danish pastry? Why do you keep on talking about it? Why do I suddenly feel afraid of it with no real reason to? Well! Three main things set it apart from the simple shortcrust pastry I've made before:
- The dough is richer. That means it's got more fat in it, and eggs too, and uses milk instead of water for the liquid.
- The dough is laminated. That means it's made with lots of thin layers of fat all the way through it, so it puffs up when it cooks.
- The dough has yeast in it. That means it rises when you leave it to stand before cooking, and rises even more in the oven too. It also changes the flavour subtly.

I think it's the laminating stage which some people are scared by (not that you should be scared - because it's not scary!), because it's the sort of technique that seems really precise and important, and like nothing you're likely to have tried before.


But really, it's simple. I find it quite reassuring to think about the science of it, in the same way as with yeast. There hasn't been a time when I've made yeast bread and I haven't convinced myself that it's not going to rise. Every single time. It always takes a while to get started, and I decide something must have gone wrong, and I don't really understand what's happening after all, and it's more than just the yeast that needs to work for it to rise and be bread.

But then every time, it is. So every time I feel a little bit more confident that, maybe it will work, even though it seems like it's not going to. The fact is, yeast really is all you need to make bread rise. Yes, the temperature might affect the speed, and the amount of yeast matters for how much it will rise and how quickly. But basically, if there is yeast, and flour and liquid, in the same place, then it will rise.

And the same thing applied to laminating the dough. All you do is roll out the dough, put loads of butter on top of it, fold it up and roll it out again. Then you fold and roll it several more times, which means the layers get thinner and thinner, and there are more and more of them. But it's not like they have to be precisely so many nanometres thick, or that if the butter from one layer breaks through slightly, the whole dough will be rock-solid. Unless you are mashing up and kneading the dough in between each roll out, then it WILL work, because it really has to. You can't make a dough that has little pockets of fat all the way through it without those pockets vaporising and puffing the dough when they get hot. It's science.

So you really don't need to be scared (if you were). And if you weren't, then congratulations - you're ahead of where I was when I started, so you'll do fine.
Fillings and shapes are really totally up to you. I'll tell you about my fillings a bit later, but I'd advise making up your own combinations because it's fun and makes it so much more impressive if you can tell people you came up with the idea from scratch too.
The ratio is a bit more complicated than some of the other ones I've used. But all the ingredients are pretty mainstream, there are just more of them in one recipe than there has been before.


So you really don't need to be scared (if you were). And if you weren't, then congratulations - you're ahead of where I was when I started, so you'll do fine.
Fillings and shapes are really totally up to you. I'll tell you about my fillings a bit later, but I'd advise making up your own combinations because it's fun and makes it so much more impressive if you can tell people you came up with the idea from scratch too.

The ratio is a bit more complicated than some of the other ones I've used. But all the ingredients are pretty mainstream, there are just more of them in one recipe than there has been before.
10 Flour : 1 Sugar : 2 Egg : 3 Milk : 5 Butter
There seems to be loads of butter, but it's needed for the laminating stage. None of it is actually in the dough itself, it all goes into the layering. I had a bit of trouble deciding what order I should write the ingredients in, but I decided on this because it seemed the most memorable, and also matches roughly with the order of the method. The only other ingredient which you have to remember is the yeast. As usual I didn't include it because the amount is a bit more variable and it's such a small amount it will confuse the ratio. I'd recommend using roughly 1% of the weight of flour, the same as you would for ordinary yeast bread. (And don't forget that the eggs are measured by weight - it's not 2 eggs, it's 2 units of weight in eggs. An egg weighs about 50g). A batch made with 500g of flour (50g of sugar, 100g of eggs - 2 eggs, 150g of milk and 250g of butter) will make round about 20 pastries. But of course the number depends on what shape and size you actually make them.


- Start off by mixing the dry ingredients together. The flour, sugar and yeast. Then add in the milk and eggs, and mix it until the consistency is doughy (don't add any butter yet), and knead it just for a minute. You're not really trying to develop gluten here, just making sure everything is thoroughly mixed together.
- Now it's rising time. Leave it until it's roughly doubled in size, could be an hour or two at room temperature, or overnight in the fridge.
- When it's risen, it's time to start laminating. Roll out the dough until it's about a centimetre thick. Measure out the butter and then all you have to do is spread out chunks of the butter over the surface of the dough. Put the butter over two-thirds of the dough, and then fold it up into thirds (like a letter). It's easier to fold up when the first third doesn't have butter on it, which is why you leave it clear. Although I'm sure if you spread the butter over the whole surface the folding part wouldn't be impossible. I got too excited and forgot to take a picture of this stage, but I'm sure you can imagine what a piece of rolled-out pastry looks like with chunks of butter all over it.
- Now put it in the fridge for about fifteen minutes, enough for the butter to firm up again. Then roll it out, to the same thickness as the first time, and fold it into thirds again. And then back in the fridge, for another fifteen minutes. Do the whole process three or four times through, so you'll be left with uncountably thin layers of butter and pastry, primed to puff up in the heat of the oven. And that's it - you've just made laminated pastry. It really wasn't that hard, was it?
- The next part is just shaping and filling, so you can do pretty much what you like from here. You could even use the pastry to top a sweet pie or something like that.
- To shape some average-looking Danish type pastries, roll the dough out until it's about half a centimetre thick. Use a sharp knife to cut it up into squares if you want to make folded-up shapes. If you want to make swirls then cut a longish rectangle instead.

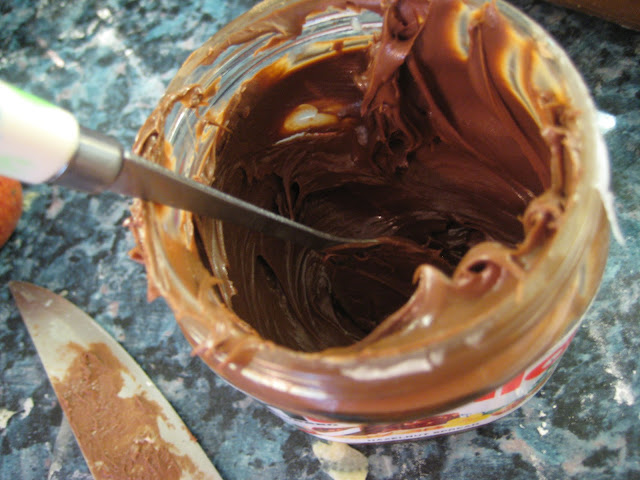
- Decide what you want to fill them with. This is where you can do whatever you like - I mean it, anything would be delicious in these. You could even make savoury versions if you just took the sugar out of the original recipe - it's only a small amount anyway so probably wouldn't make much difference. To fill mine, I made three different types. The first were swirls filled with Nutella and almonds. I cut out a rectangle, spread the surface all over with Nutella and sprinkled with slices of almond. Then just roll it up, trying to avoid squidging all of the filling out of the end as you go, and then slice it up into individual flat pastries. For the pinwheel shapes, I filled them with raisins and cinnamon. I made a mixture of a bit of melted butter, some brown sugar, cinnamon and raisins and then spread that over the individual squares of pastry. To fold them up, cut a slit form each corner, halfway into the centre. Then take the flap and fold it back over itself into the middle. The last type where turnovers filled with apple and jam. I just spread the squares with some strawberry jam, and then laid on slices of apple. To fold them up, just take opposite corners and fold them into the middle, pressing one over the over to keep them in place.

- Those are just my filling ideas, you really could do anything. They'd be nice with pretty much any combination of different fruits, nuts and seasonings. Be imaginative! Once they're filled and shaped, and in the form they will be when they go in the oven, it's time to let them rise again. In the same was as with bread, where you let the dough rise once, then shape it into it's final form to rise a second time. They'll need somewhere around an hour or a bit less, until they've risen up nicely. The exact size doesn't really matter here - mine didn't rise as much as I'd hoped the second time, but when they went in the oven they still puffed up wonderfully.
- Once they've risen well (or you're too impatient to wait any longer, like I was), then it's oven time. Put the oven on my favourite temperature, 180C, and put them in, on some kind of baking tray. They'll take around 15 minutes, possibly a little bit longer. If you want a really shiny, crispy surface on them, brush them with a bit of beaten egg or some milk, using a pastry brush, just before you put them in the oven.

And that's all it takes. It looks like a long and complicated process, but really the only time-consuming parts are all the periods of waiting in between stages - the bits where you don't need to be on hand anyway. It really isn't as scary as you may or may not think it is.
No comments:
Post a Comment